Streaming CAD From a Windows PC to Mac with Sunshine, Moonlight & Tailscale
How I run CAD software on a Windows desktop and use it from my Mac anywhere, using Sunshine, Moonlight, and Tailscale.
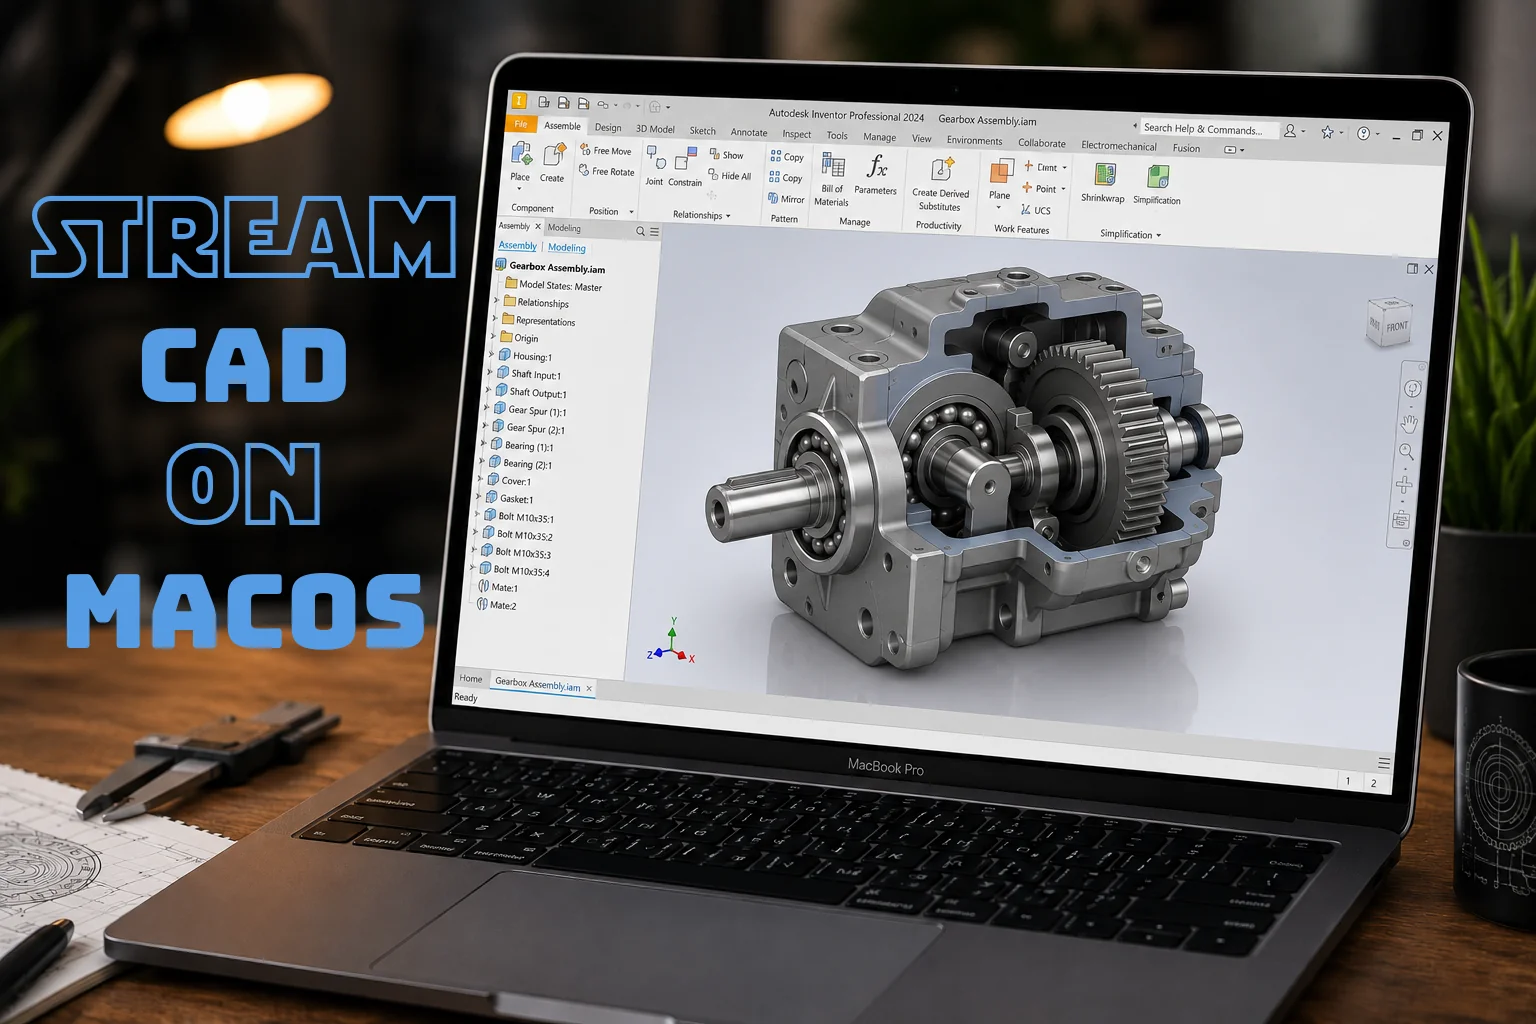
From Windows to macOS
After years of slowly growing unease with Windows, I finally decided to switch to macOS. Part of the reasoning was practical: I wanted to take advantage of Apple Silicon’s unified memory architecture to run local AI models. But honestly, just as much of it was death by a thousand cuts — the constant login issues across Office 365 apps when juggling a personal and a work account at the same time, the notification overload from every installed program, and a never-ending war with my printer driver. None of these issues are unsolvable by themselves, but the sum of them slowly wore me down until using Windows started to feel like a chore.
macOS promised the solution: clean, well-designed UI, a fast-growing ecosystem for AI and robotics work (the user base in that space seems to have grown a lot lately), and a genuinely nice Unix shell.
Here’s the thing — I’d been a Windows and Linux user since childhood, and for years I wrote off Mac users as inmates of an overpriced, performance-lagging (if undeniably well-designed) metal box. What changed my mind was a deal too good to pass up. While running my first agentic home-server experiments with openclaw, I picked up a Mac Mini for 579 € — 16 GB of RAM, a 256 GB SSD, and an M4 chip onboard. (Prices have crept up since, thanks to the global RAM supply crunch.) And when first using the device I realised that most of my prejudices were wrong.
The CAD Problem
There was one catch. As a mechanical engineer — and for plenty of personal projects — I rely on CAD software to design parts and assemblies, and macOS has long been the neglected platform for the big CAD vendors. There’s no native Inventor or SolidWorks on macOS — the only real options are cloud-based tools like Fusion 360 and the browser-based Onshape.
I could picture myself living with those if I absolutely had to, but I’ve spent years getting fast and efficient in Inventor. Switching tools feels disabling — it slows me down exactly when I want to get work done.
Luckily, I found a setup that solves this and feels great to use, and I think it could help a lot of people in the same boat. Since I haven’t seen this anywhere in the context of CAD usage, I want to introduce the setup here. There are just two requirements:
- A second machine running Windows, with the CAD software of your choice installed
- A permanent and stable internet connection on both devices
If you can manage that, here’s how it’s done.
How It Works
Sunshine runs on your CAD desktop and encodes its screen on the GPU. Moonlight runs on your Mac, decoding that stream and displaying it. Tailscale links the two machines over an encrypted private network, so it all works even when they aren’t on the same LAN — with no port forwarding and nothing exposed to the public internet. Optional but very much needed if you’re used to using a SpaceMouse is VirtualHere — it forwards USB devices over the network, so a SpaceMouse plugged into your Mac shows up on the Windows PC as if it were connected locally, letting Inventor talk to it directly.
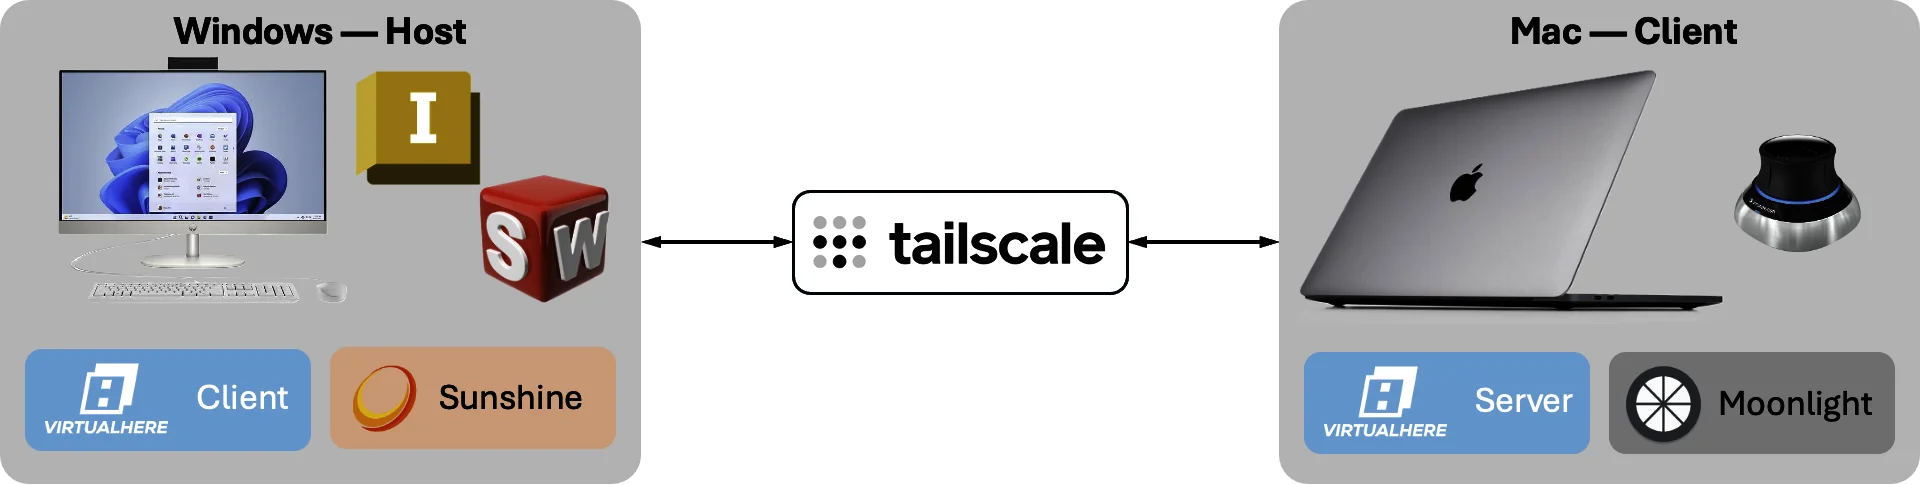
This guide is written from a Mac, but the client side isn’t Mac-specific at all — Moonlight has native apps for Windows, Linux, Android, and iOS/iPadOS too. So the exact same host setup lets you pick up your full CAD workstation from a Windows laptop, a Linux machine, or even a tablet on the couch.
Why not just use Remote Desktop? Because RDP and VNC were built to remote an office, not a 3D viewport. Sunshine/Moonlight is game-streaming tech: it encodes the real GPU-rendered desktop with the host’s hardware encoder and decodes it at 60+ fps with minimal latency — so orbiting a CAD model feels local and text stays sharp. It’s also free, open-source, and fully self-hosted.
Step 1 — Connect Both Machines with Tailscale
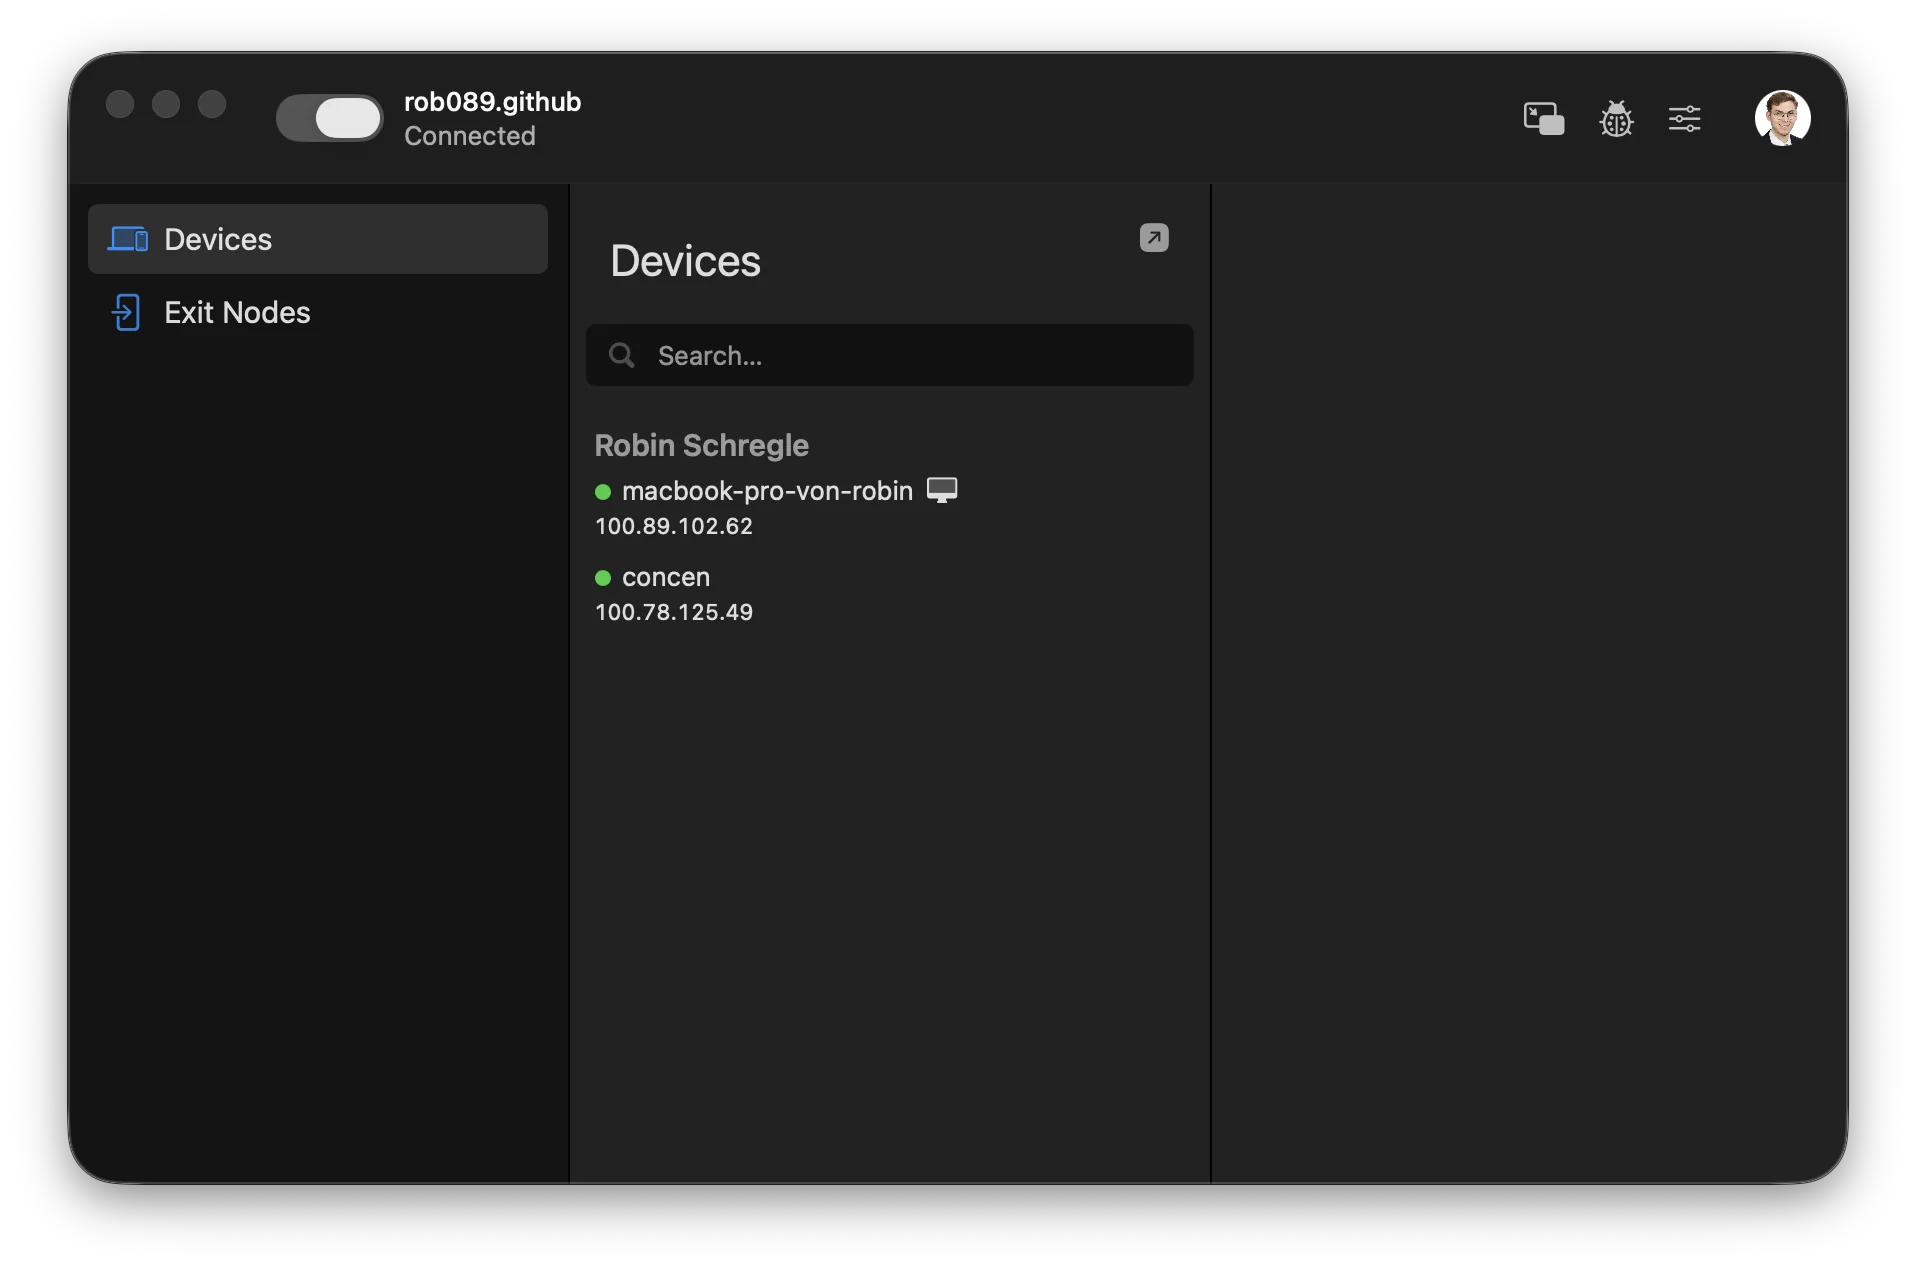
Tailscale is responsible for connecting the two machines to a single private network, so start here (you can skip this part if you only want to use this while both devices are on the same network). Create a free account, then install the app on both the Windows PC and the Mac from the download page. Sign in to the same account on each device — that shared login is what places them on the same tailnet — and make sure Tailscale is toggled on and showing as connected.
Both machines should appear in your admin console, each with its own 100.x.y.z Tailscale IP and a MagicDNS name (like in my case macbook-pro-von-robin). Notice the Windows PC’s Tailscale IP or its MagicDNS name — that’s the address you’ll point Moonlight at in Step 3.
Step 2 — Set Up Sunshine on the Windows PC
Next you’ll install Sunshine on the Windows PC running your CAD software. Head to LizardByte’s Sunshine GitHub repository — they ship precompiled releases for a range of platforms, including Windows AMD64 and ARM64 installers. Open the releases page, grab the latest version (v2026.516.143833 at the time of writing), and run the installer.
During setup, let Sunshine install as a service and allow its firewall rule. Running as a service means it starts automatically with Windows and is ready to accept connections without anyone logging in first.
When installation finishes, launch Sunshine and it opens its web interface in your browser at https://localhost:47990. The browser will show a security warning the first time — that’s expected, just click through it. On first launch you’ll set a username and password; these protect the web interface and are also the credentials Moonlight uses when it pairs.
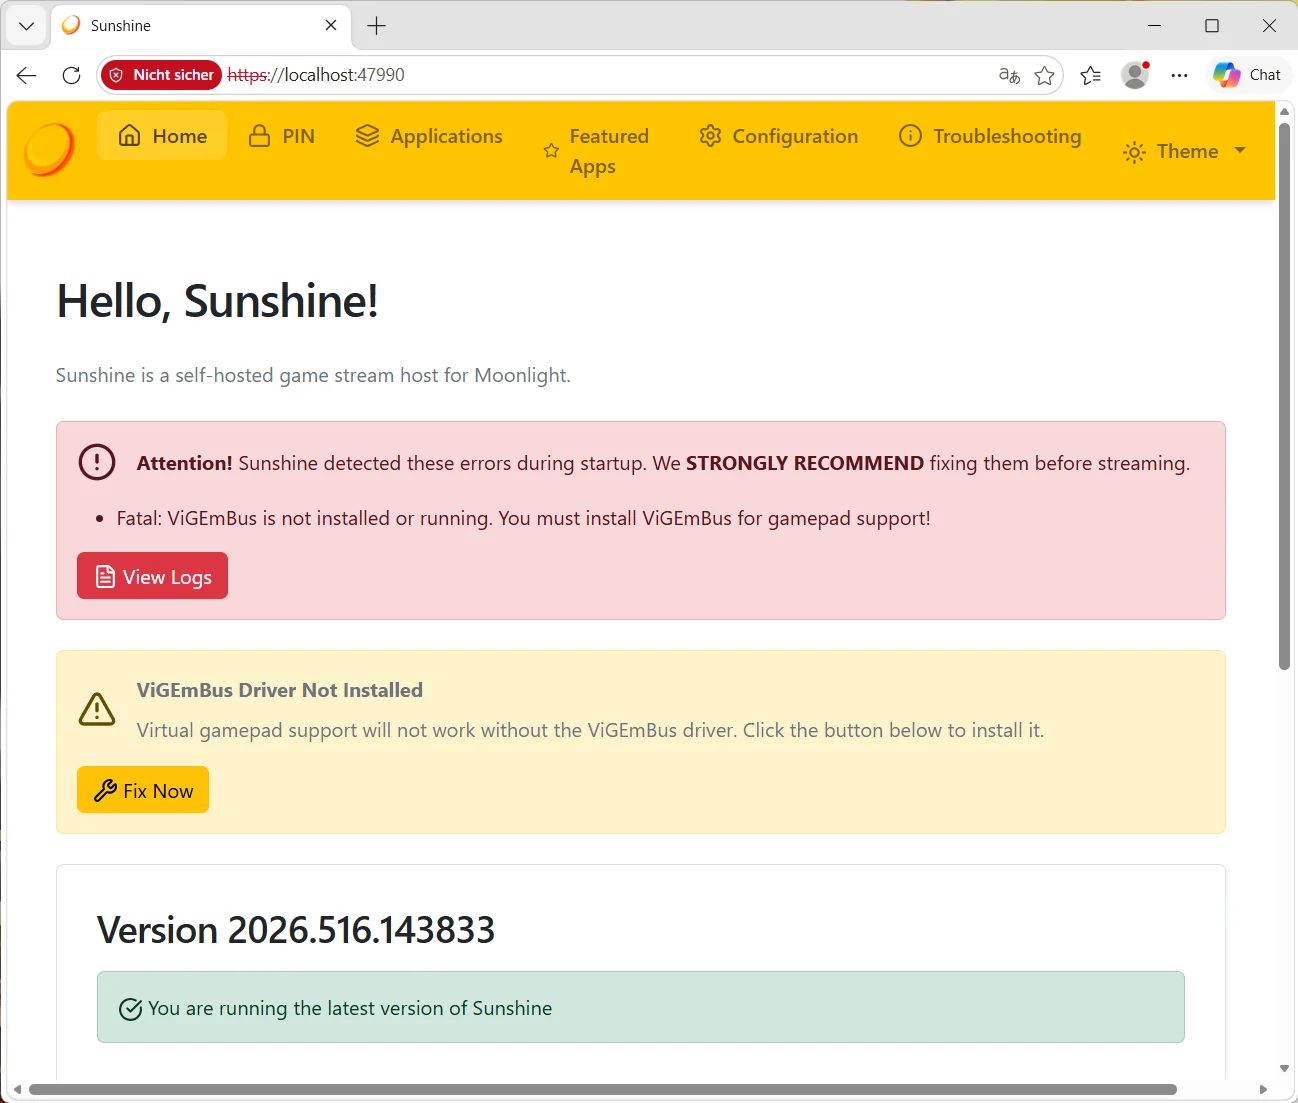
Sunshine auto-detects your GPU and picks the matching hardware encoder for you (NVENC on Nvidia, AMF on AMD, QuickSync on Intel), and the stream’s resolution, framerate, and bitrate are handled on the client side in Moonlight. In my experience the stock defaults just work — I’ve never needed to touch a setting to get a sharp, responsive CAD session.
Step 3 — Set Up Moonlight on the Mac
Install Moonlight on the Mac — you can grab it from the releases on the moonlight-qt GitHub.
Make sure Tailscale is running and connected on both devices, then open Moonlight. It scans the local network automatically, but because our host is reachable over Tailscale rather than the LAN, click Add PC manually in the top-right and enter the Windows PC’s Tailscale IP — the 100.x.y.z address from Step 1 (its MagicDNS name works too). The machine then appears as a tile.
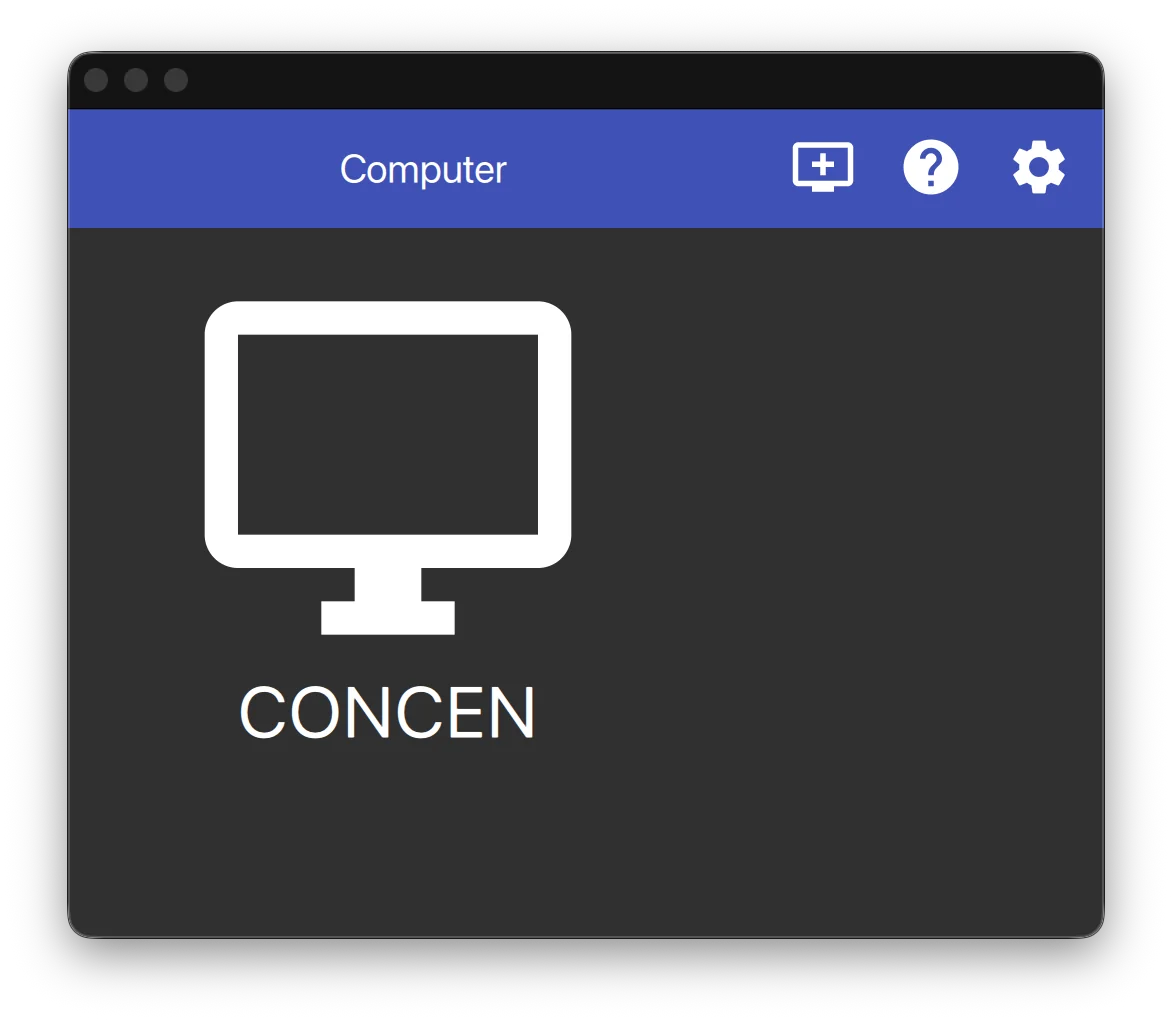
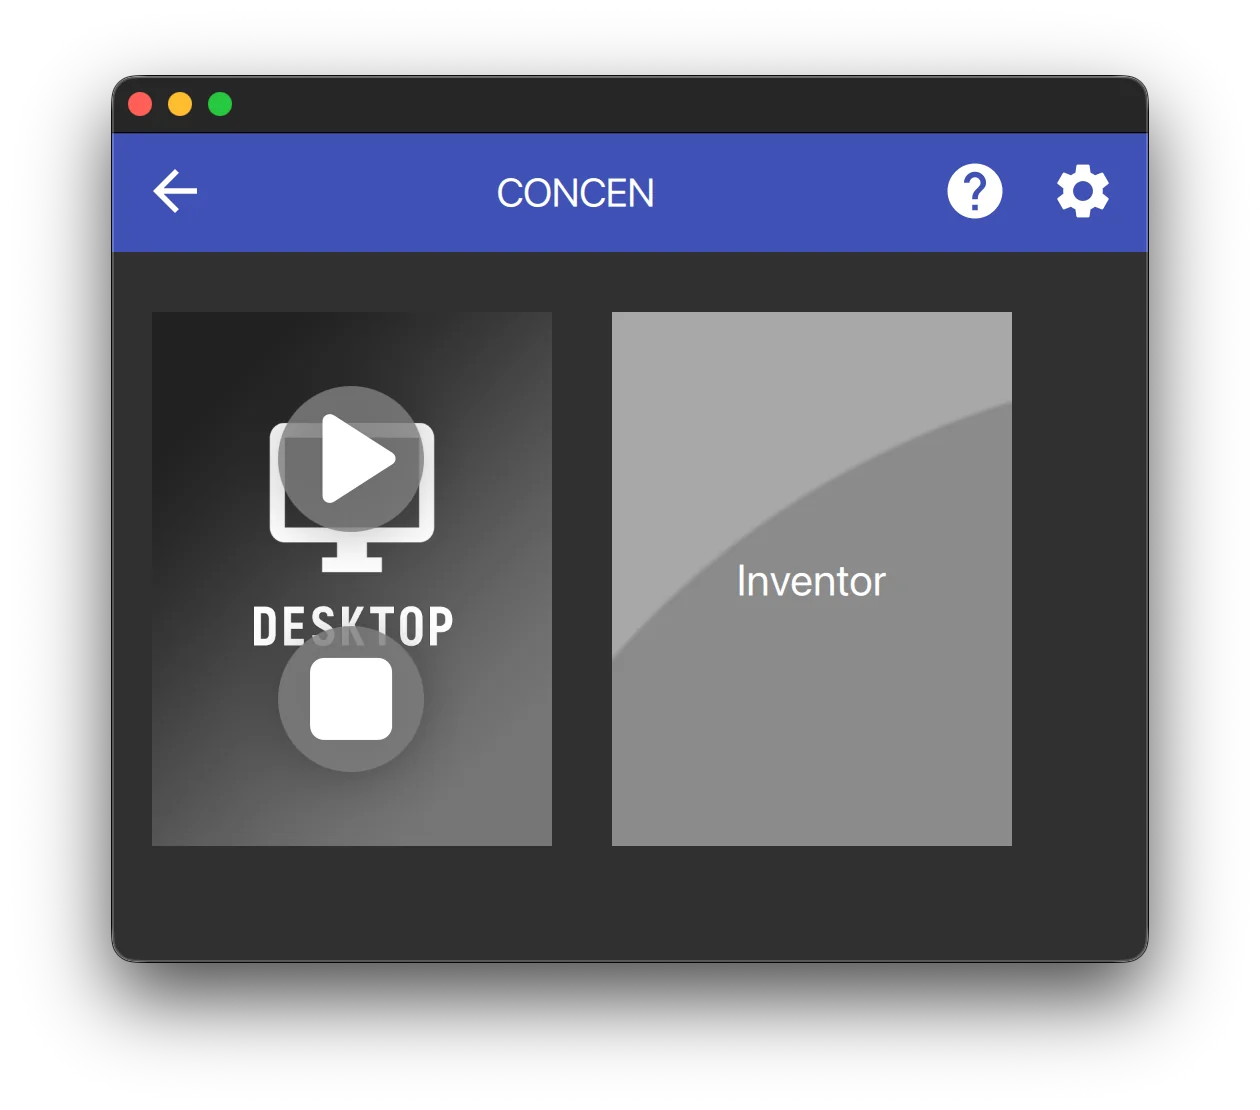
Click that tile and Moonlight shows a four-digit PIN. To authorise it, switch back to the Sunshine web interface on the Windows PC, open the PIN tab, enter that PIN along with a name for the Mac, and submit. Once the handshake completes, the tile offers a Desktop entry — launch it and your Windows desktop fills the Mac’s screen, where you can run any application just as you would sitting at the machine itself.
Beyond the default Desktop tile, you can also add a shortcut straight to a specific program: in the Sunshine web interface, open the Applications section and click Add New, then give it a name and point the Command field at the executable’s path. It then appears as its own tile in Moonlight.
Step 4 (Optional) — Use a SpaceMouse via VirtualHere
If you’ve followed the steps above and rely on a SpaceMouse, you’ve probably noticed it doesn’t work over the stream. Moonlight and Sunshine forward video, audio, and standard keyboard and mouse input, but they don’t pass through arbitrary USB devices — so a 3D mouse plugged into the Mac is invisible to Inventor running on the Windows PC.
VirtualHere bridges that gap. It’s a USB-over-IP tool that comes in two halves: a server that shares a physical USB device, and a client that mounts it on a remote machine. Since the SpaceMouse is plugged into the Mac but needs to be seen by Windows, the server runs on the Mac and the client on the Windows PC. (VirtualHere is commercial, but its free tier shares a single USB device — plenty for one SpaceMouse.)
Grab both from virtualhere.com: the macOS server and the Windows client. Start the server on the Mac with the SpaceMouse connected, then launch the client on Windows.
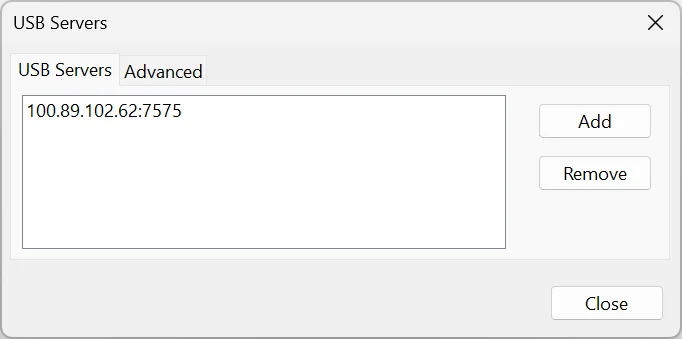
At first the client’s window stays empty — it only auto-discovers servers on the local network, and our Mac is reachable over Tailscale rather than the LAN. To point it at the Mac by hand, right-click USB Servers and choose Specify USB Servers.
In the dialog, enter the Mac’s Tailscale IP (the 100.x.y.z address from Step 1) and port 7575, then confirm.
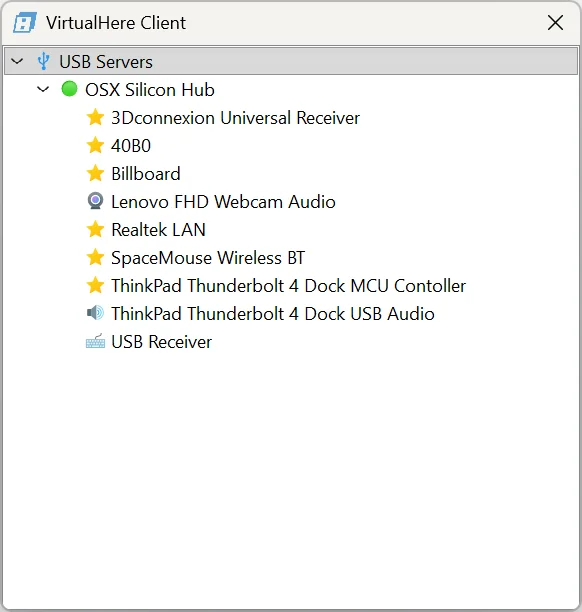
The Mac now appears in the client with the SpaceMouse listed beneath it — right-click the device and select Use this device. Windows treats it as if it were plugged in locally, and Inventor picks it up straight away.
Step 5 — First Real Session
With everything connected, open your CAD software through the stream and put it through its paces: orbit, pan, and zoom a reasonably heavy assembly, draw or edit a sketch, and read some small dimension text. If orbiting feels responsive, the cursor tracks without a rubber-band lag, and text stays crisp rather than smeared, you’re in good shape. But “feels fine” is subjective, so it’s worth putting real numbers on it.
Moonlight can show a live performance overlay during a session — enable it under Settings → “Show performance stats while streaming”. It breaks the delay down into the parts that matter: how long the Windows GPU takes to capture and encode each frame, the network round-trip, and how long your Mac takes to decode it.
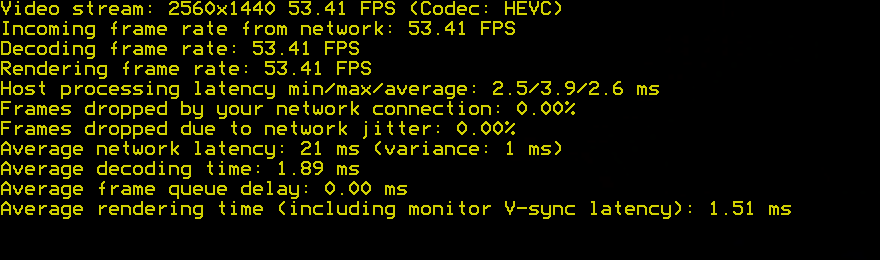
Here’s a real session of mine, streaming a 1440p HEVC feed: host processing latency averages 2.6 ms, decoding sits under 2 ms, and not a single frame was dropped. The bulk of the delay is the 21 ms network round-trip — the physical distance between the two machines — and even that stays perfectly comfortable for CAD.
Was It Worth It?
Absolutely. This setup erased the one real downside of my switch to macOS: Inventor runs exactly as it always has — because it is still running on the Windows machine — and orbiting an assembly over the stream feels indistinguishable from sitting at the desk.
What surprised me most is how little the client needs to be and how smooth the control felt, even when using the SpaceMouse. All the heavy lifting — rendering, storage, compute — stays on the Windows PC, so the Mac is just a thin window into it. My CAD files and multi-gigabyte installs never touch the laptop’s SSD, and even very basic hardware is enough to decode the stream; a base-model MacBook Neo would handle it without a problem. The only thing you can’t design around is a stable internet connection on both ends. Give it that, and you get the best of both worlds: a native macOS daily driver with a full CAD workstation a click away.
Links & References
- Sunshine — host
- Moonlight — client
- Tailscale — mesh VPN
- VirtualHere — remote USB